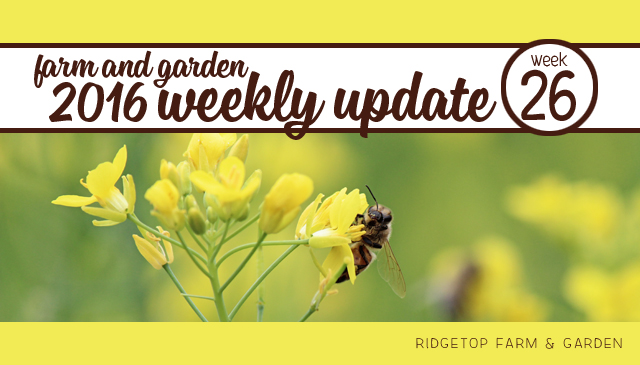
Read more "2016 Update – Week 26"
The post 2016 Update – Week 26 appeared first on .
]]>
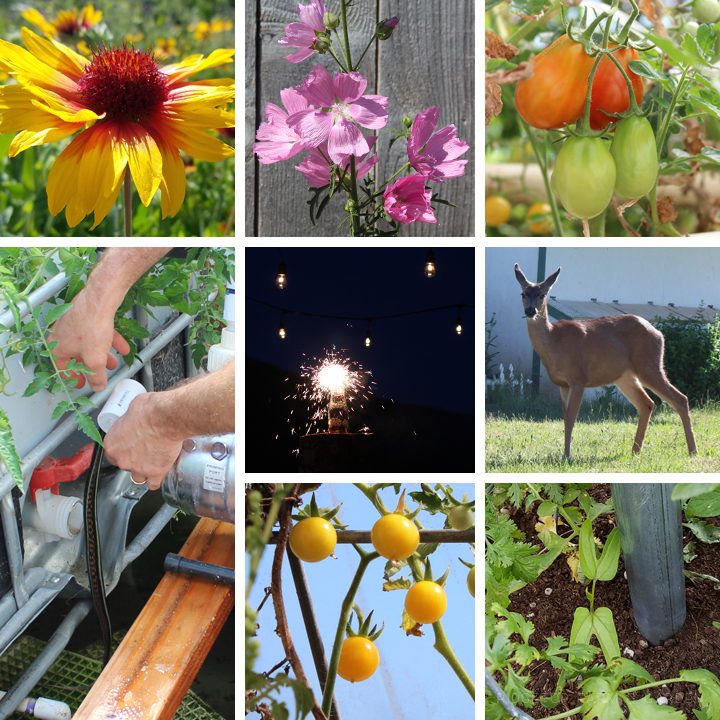
• Flowers are blooming.
• Tomatoes in the greenhouse are ripening.
• The lighting on our patio is up and it’s beautiful. We did sparklers already.
• Many snakes have been calling the greenhouse home. I’m assuming they enjoy the warm temperatures. Unfortunately, one didn’t make a good choice in his exploring. The pump on the aquaponics system wasn’t running, which is always a big concern for Farmer John. When he investigated, he found a snake had climbed through the pipes and got caught in the pump. The outcome was not good for the pump or the snake.
The post 2016 Update – Week 26 appeared first on .
]]>Read more "Running Recap of 2015"
The post Running Recap of 2015 appeared first on .
]]>
I started 2015 as a runner-ish type person with the goal of finishing a half marathon. I surpassed that goal by finishing two. They are definitely personal highlights of 2015.
I’m very mediocre in the running department. I’m probably even below average. So, my end of the year recap isn’t full of fast times and a kazillion training runs. What I do have are my personal accomplishments at finishing what I set out to do and my version of keeping my heart healthy.
RUNNING HIGHLIGHTS: MONTH BY MONTH
January
• After taking a month off, I started getting back at it
February
• Training began for my first half marathon.
• Finished a Virtual Groundhog Day 10K
• Finished Heart Breaker 10K
• Finished Mommathon 10K
March
• Run/Jog/Walk the furthest I’d gone until that point – 8 miles. Bonus points for making the 12 minute pace I was striving for. To be exact my pace averaged 11:58/mile
April
• Run/Jog/Walk the furthest I’d gone until that point – 10 miles. Average pace was 12:35/mile. Didn’t quite make my goal of a 12 minute pace.
• Took a 2 week break from running while vacationing in Europe. I had plans to run, it just didn’t end up happening. However, I did walk… a lot.
May
• Walked the Neverland 5K with friends at Disneyland
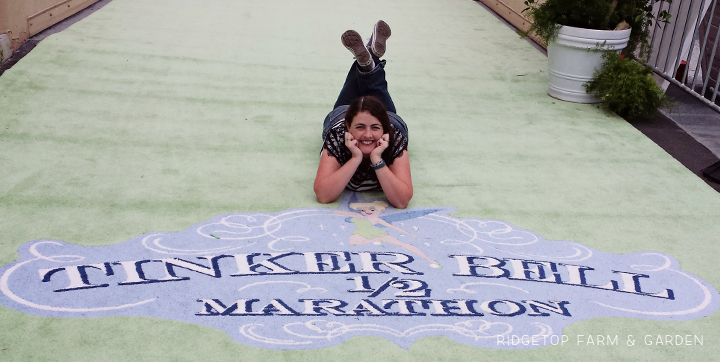
• The big moment arrived. I completed my first half marathon!
June
• Ran 2 miles on National Running Day, averaging an 11:15 pace
• Finished Love Rocks 5K
July
• Finished Red, White & Blues 10K
August
• Finished Garlic Fest 10K
• Ran 5 miles on the beach to celebrate signing up for another half marathon
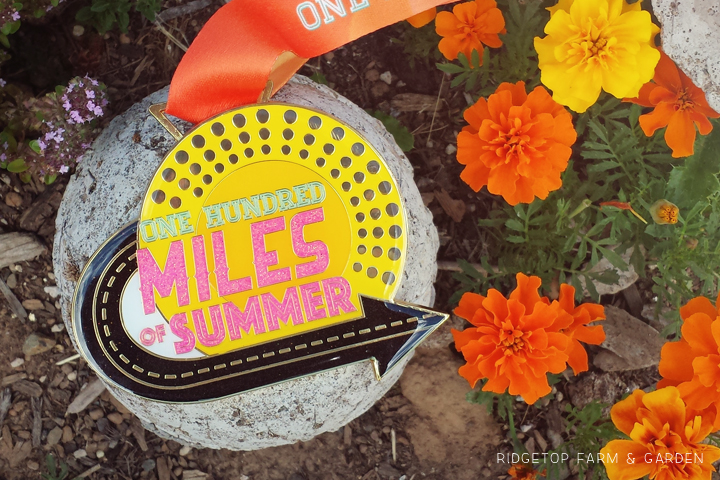
• Completed the 100 Miles of Summer challenge. But barely. I squeaked in the 100 miles by running outside, walking a number of times with my girlfriends and running on our elliptical machine at home.
September
• The kids started school, so I was able to get into a good running routine.
October
• Same routine as September, but had to kick it up a notch since another half was soon approaching.
November
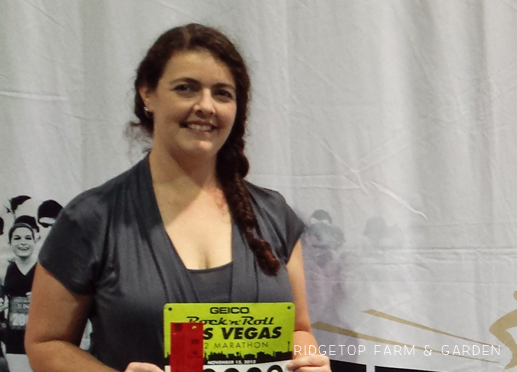
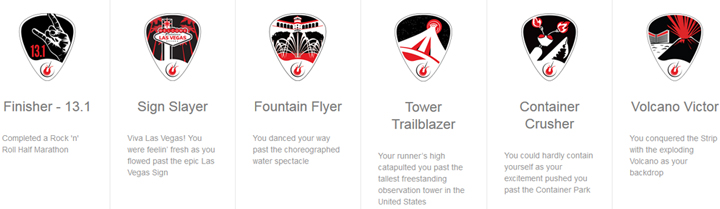
• Finished the Rock n Roll Half Marathon in Vegas. I averaged a bit over a 14 min/mile. Not quite the time I was hoping for, but the weather sucked and I had horrible hip pain. Still, totally happy that I finished.
December
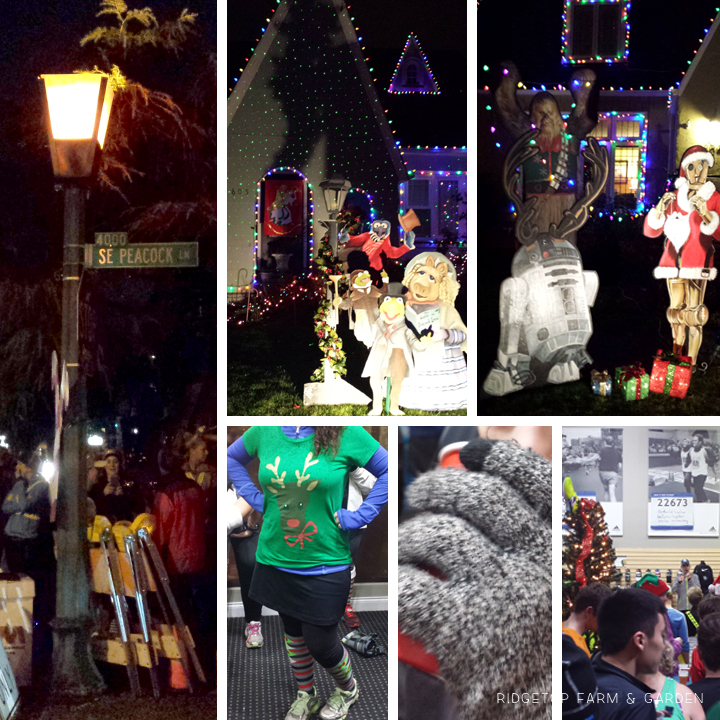
• Finished the year off with my hubby and kids. We ran/jogged/walked 4+ miles with Portland Running Company to Peacock Lane.
I RUN FOR BLING
I will never be the first to cross the finish line or even win an age group award. I’m not being down on myself. It’s true. I’m ok with that. I don’t run to win. If I did, I would have given up a long time ago.
Instead, I run for the self satisfaction of completing what I set out to do. It’s not easy for me. I’m slow, but it’s still difficult. Completing any run is an accomplishment.
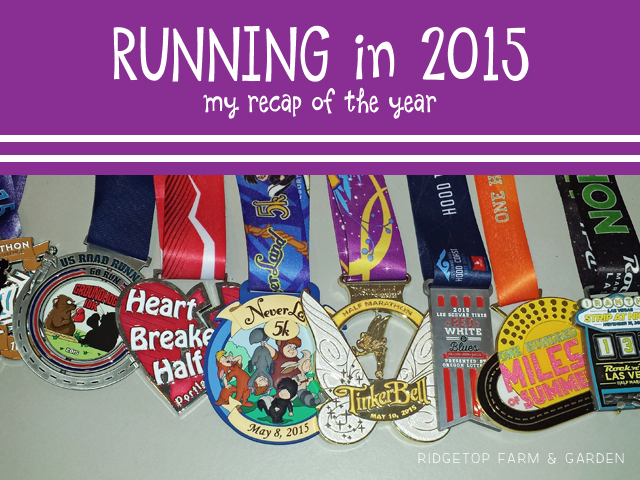
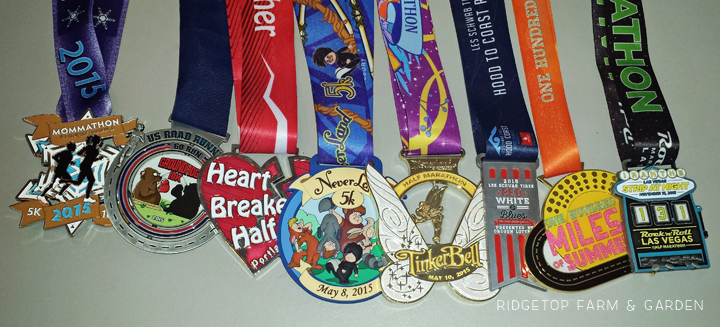
I also run for the bling. There are so many fun medals in the world of running and I enjoy collecting them. This year I earned 8. My favorite is definitely the TinkerBell. A close second, though, is the one from Vegas. It is pretty awesome.
Badges are fun, too. These ones are from the Rock n Roll Half in Vegas
2015 Stats
5K Events: 2
10K Events: 4
Half Marathon Events: 2
Virtual Events: 2
Other Event: 1
Total Miles Run/Jogged (training runs included): 440.47
I just loved this sign from Brooks at the Rock n Roll expo in Las Vegas. It’s such a good reminder.

All in all, not a bad year for running. Bring on running adventures of 2016!
The post Running Recap of 2015 appeared first on .
]]>Read more "12 Days: Christmas Tree Canvas Painting Tutorial"
The post 12 Days: Christmas Tree Canvas Painting Tutorial appeared first on .
]]>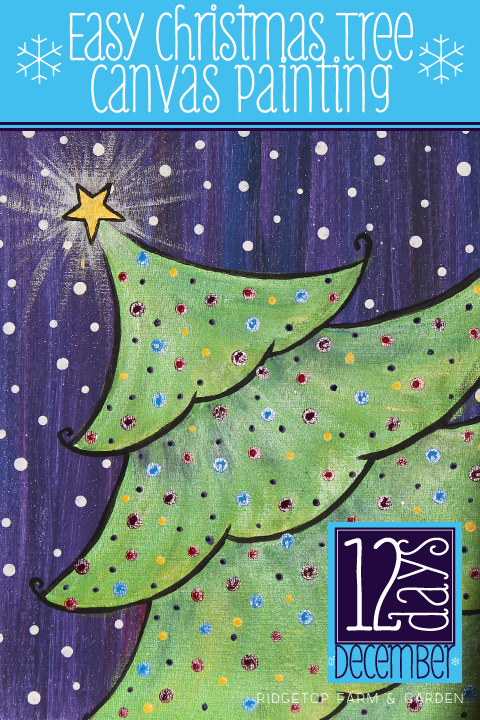 Our 7th Day of December is featuring a do it yourself canvas painting.
It is not the fanciest painting you ever did see, but it’s festive, fun and fairly simple to create.
Have you seen those places where you get to drink wine with your girlfriends while creating a fabulous painting? I’ve always wanted to go. Unfortunately, I have not.
I have especially wanted to take my 10 year old son to such a place, minus the wine, of course. I don’t, however, want to spend $50+ for the 2 of us to create the same painting. So, I came up with a painting we can all do. It’s simple enough for the kids. It’s also fun enough to be part of a girls wine drinking paint party.
My goal was to create a painting that was cute and something I’d actually want to display in my home, as well as be cost effective. I also wanted it to be doable for all artist levels.
12 Days of December
December 7th: Easy Christmas Tree Canvas Painting Tutorial
Items You Will Need
• Canvas – I used 11″ x 14″ canvas panels. The canvas panels are slightly cheaper than the wood framed canvas. During a holiday sale, I was able to get a 3 pack at Joann’s for $4.80.
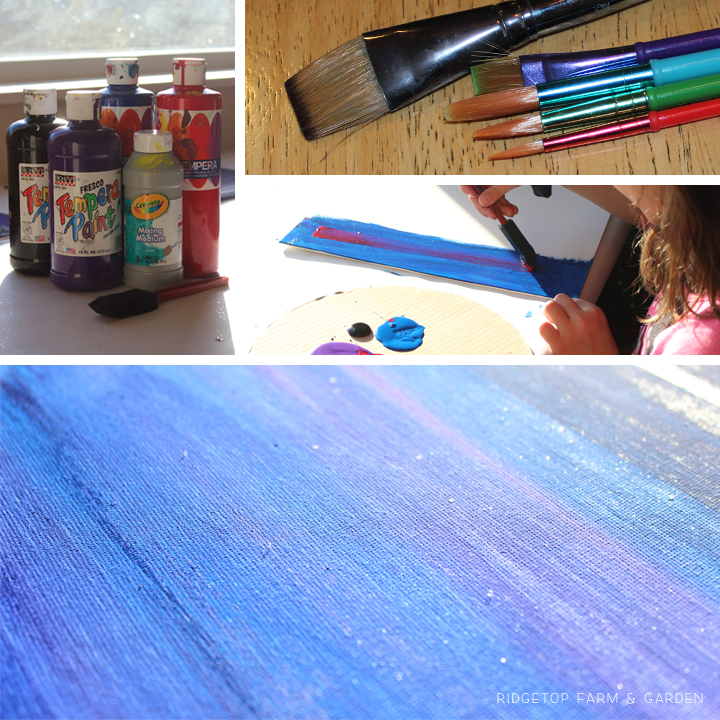
• Paint – I’ve used both tempera and acrylic paints for this project. Both work fine. I prefer acrylic, though. In the following instructional steps I list the colors I used for reference purposes only. Feel free to use whatever colors you have on hand. And, don’t be afraid to mix your own colors if you don’t have quite the variety you would like.
• Paintbrushes – As much as I like painting with the “nice” brushes, I paint a lot with the kids, so I most often use the cost effective 5 pack of Crayola paint brushes. They are usually priced around $5 and will often be on sale for less. That set of brushes works perfectly for this project. I did, however, use a wider brush for the background.
• Palette – You just need something to hold your paint. It can be an actual palette, cardboard, or a paper plate. My favorite is the cardboard from a frozen pizza. It’s silly, but I like it because of the round shape.
• Table Cover or Easel – If you have an easel, that’s fantastic. Use it. Around here, though, we don’t have enough easels for the number of painters. So, I put white butcher paper on our kitchen table and we paint away. Newspaper would work fine, too.
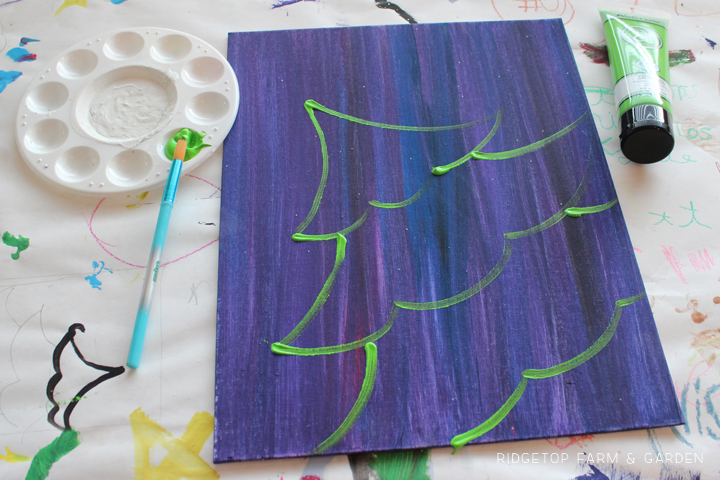
Step 1: Paint the Background
• For the kids I used tempera paints in black, purple, blue, and red. The adults used acrylic paint.
• I also mixed in glitter. This is not a necessary step. I just like glitter.
• The kids used a foam brush to paint the background. Adults used a 1″ paint brush. Again, either one works fine. Use whatever you have.
• The trick to this background is not mixing the colors before applying the paint to the canvas. I squeeze blobs of paint onto the palette. Then brush them onto the canvas, blending them here and there. But, allowing the individual color to show through as well.
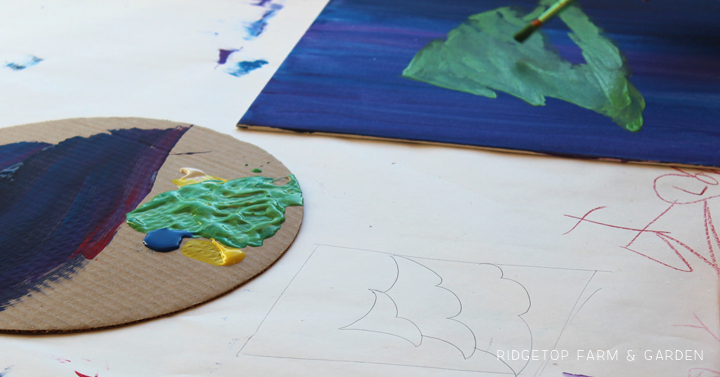
Step 2: Outline the Tree
• Using a light green acrylic paint, I painted an outline of the tree. You could draw it in pencil first, if you would like. But, I didn’t.
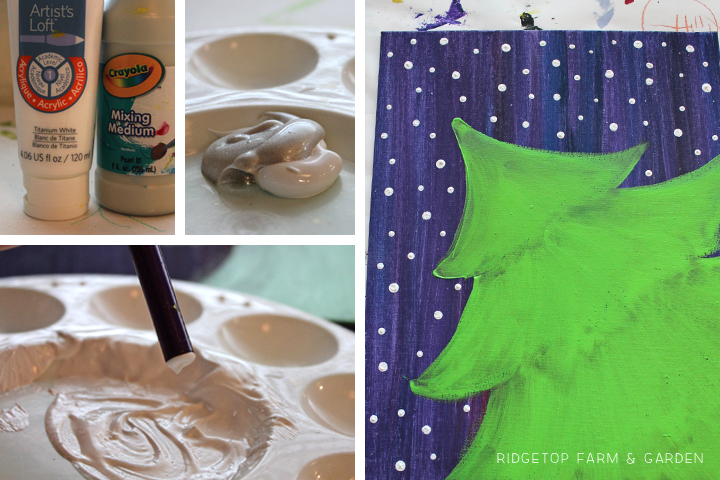
Step 3: Fill in the Tree
• Using the same light green paint, fill in the entire tree area.
• I used mostly downward strokes, resembling tree branches. No moving my brush horizontally.

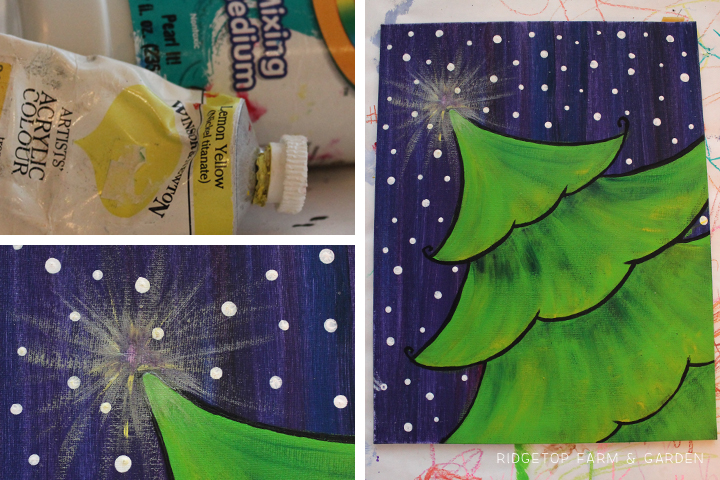
Step 4: Adding Snow to the Background
• I mixed together white acrylic paint and pearl it medium from Crayola for the snow. The mixing medium isn’t necessary. I just have it, so I used it.
• Painting circles is super simple. Flip your brush over. The end of your paintbrush is now the brush you are using. Dip the end in white paint and dab onto the canvas for snow. Using different brushes will give you a variety of circle sizes.
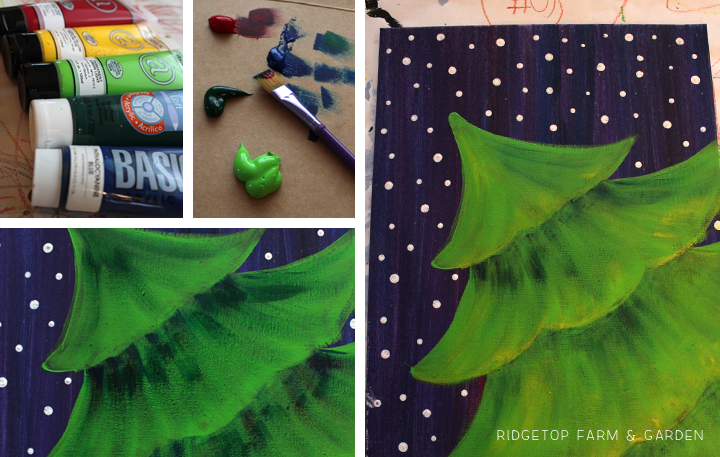
Step 5: Adding Detail to the Tree
• Using a variety of paints (Cadmium Red, Cadmium Yellow, Light Green, Deep Green, & Phthalo Blue) I created depth to the tree. I used mostly a dry brush technique, but also blended colors right on the canvas.
• Again, I used vertical or sweeping strokes. No horizontal painting.
• The deep green, phthalo blue, and cadmium red were used where I wanted shadows. The cadmium yellow was painted where I wanted a highlight.
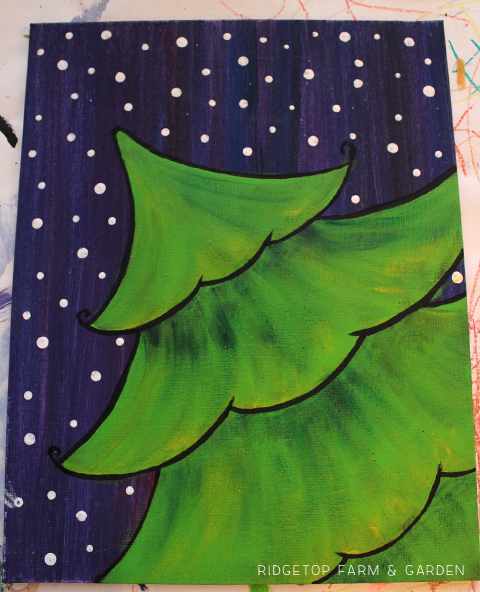
Step 6: Outline the Tree
• Using black acrylic paint, I outlined the tree.
Step 7: Painting the Star Glow
• I used lemon yellow acrylic paint and pearl it medium for the glow effect. White paint mixed with a dab of yellow would work as well.
• I used a dry brush technique. Each stroke began in the center and then pulled out.
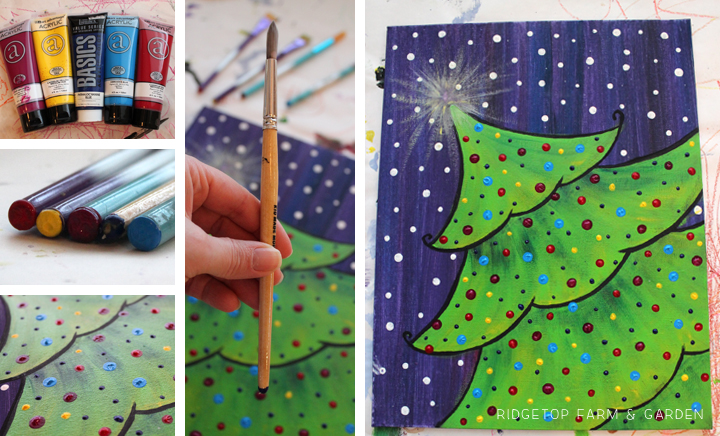
Step 8: Adding Lights to the Tree
• Using the same technique as the snow, paint the lights using the end of the paintbrush.
• My paint colors were: Deep Magenta, Cadmium Yellow, Phthalo Blue, Cerulean Blue, and Cadmium Red
Step 9: Painting the Star
• Using Cadmium Yellow paint a star at the top of the tree.
• Allow the yellow paint to dry a smidge, then outline the star in black paint.
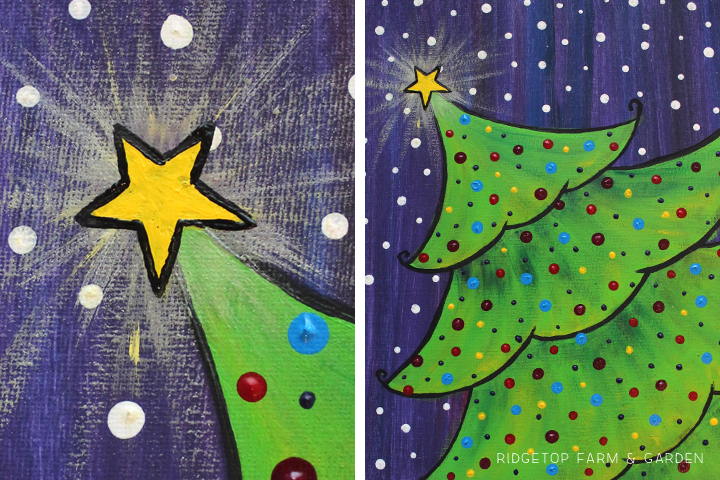
Step 10: Enjoy your Festive Painting
For a quickie version of the steps, print the jpg below.
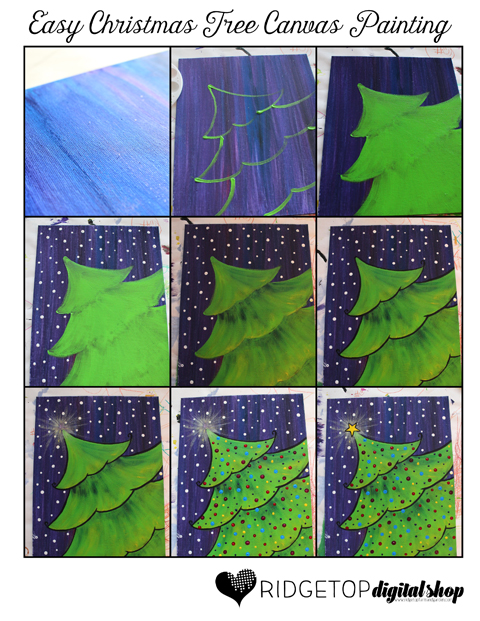
Please enjoy this tutorial! However, do not sell or share the images as your own. Please link back to this original post.
All 12 Days of December:
December 1st: Hot Drinks Bar Party Kit • Printable
December 2nd: Warm Up Here Burlap & Canvas • DIY
December 3rd: Photo Booth Backdrop • DIY
December 4th: Snowman Photo Booth Props • Printable
December 5th: Let it Snow Gift Card Holders • Printable
December 6th: Christmas Gift Box • Printable
December 7th: Christmas Tree Canvas Painting • Tutorial {you’re already here}
December 8th: Hot Drink Pouch • Printable
December 9th: Build Your Own Snowman Gift Tags • Printable
December 10th: Let it Snow Gift Tags • Printable
December 11th: Christmas Word Search • Printable
December 12th: Let it Snow • Printable
I would love to see how you used these 12 Days projects. Please share your creation(s) with us here.
The post 12 Days: Christmas Tree Canvas Painting Tutorial appeared first on .
]]>Read more "12 Days: Warm Up Here Burlap and Canvas"
The post 12 Days: Warm Up Here Burlap and Canvas appeared first on .
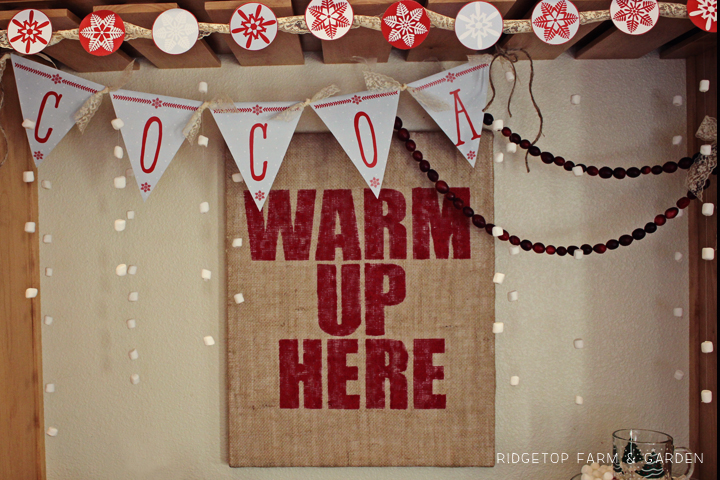
]]>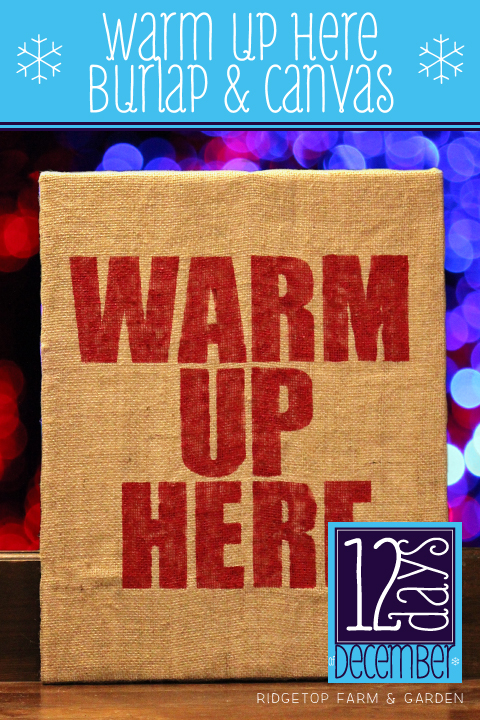 Day 2 of our 12 Days of December series is an addition to yesterday’s Hot Drinks Bar Party Kit. We are making a burlap sign to hang in the Bar area.
12 Days of December
December 2nd: Warm Up Here Burlap & Canvas Sign
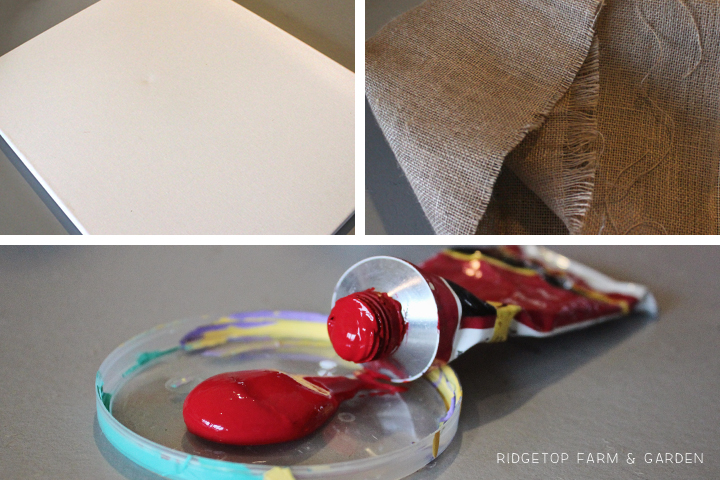
Materials
16″ x 20″ Canvas
Burlap – at least 20″ x 24″
Red Acrylic Paint and Paint Spouncer
Exacto Knife and Cutting Mat
Scissors, Stapler, Paper, and Tape
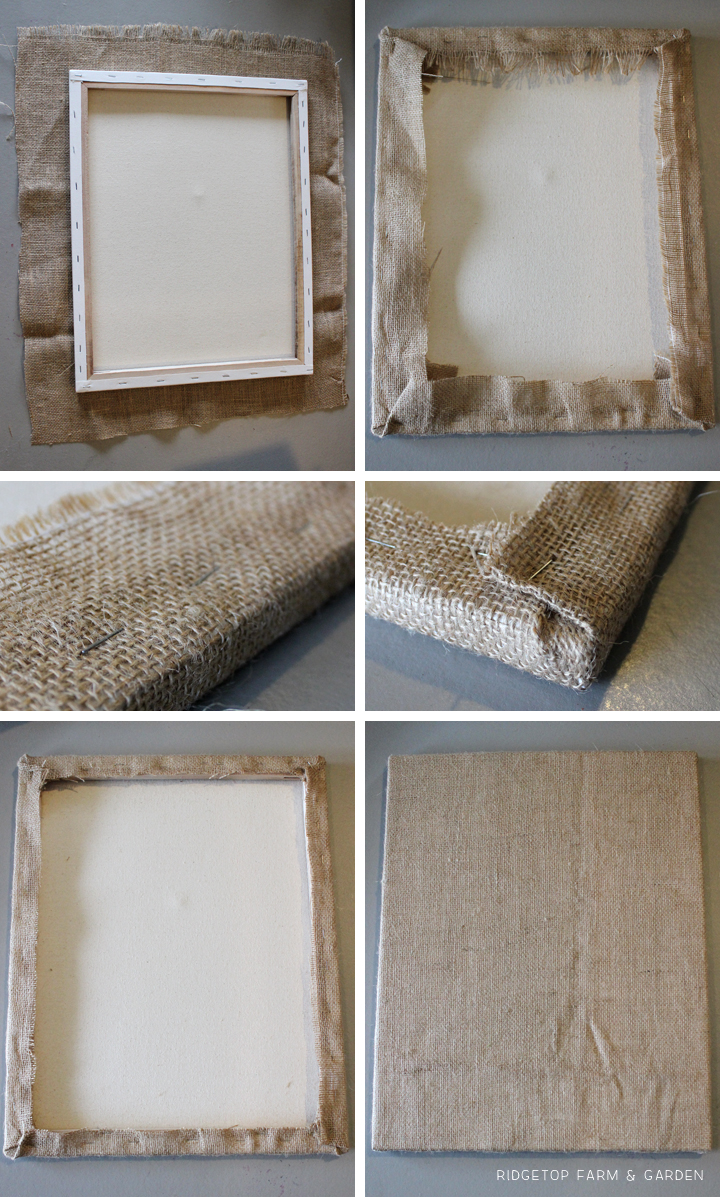
Attaching Burlap to the Canvas
Top Left: Center canvas right side down on burlap
Top Right, and Middle Photos: Fold burlap over edge of canvas, pulling slightly so it has a snug fit. Staple in place.
Bottom Left: Trim burlap edges
Bottom Right: Flip over and enjoy how easy it was to add burlap to your canvas.
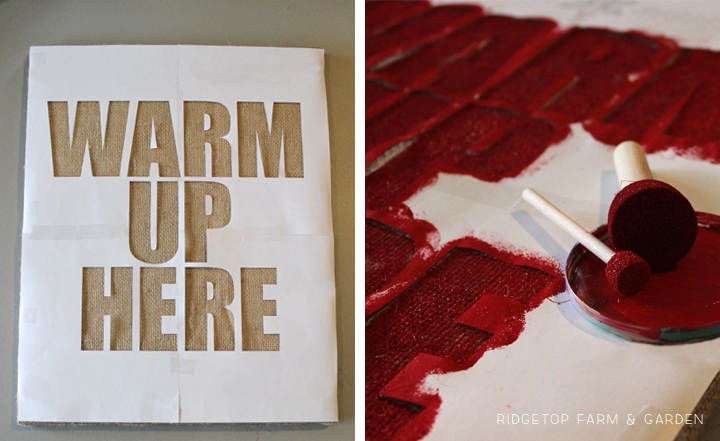
Creating and Painting the Stencil
I’ll admit this is a little tedious. Not difficult, just not all that fun.
Click here to download the 4 pages for the stencil.
Using an exacto knife and cutting mat, cut out the letters. This is a stencil, so the actual letter piece is not being used. Don’t forget to keep the insides of the A, R’s and P. Tape the stencil together, then tape the stencil to your burlap canvas.
Using red acrylic paint, dab the spouncer into the blank parts of the stencil, paying attention not to get paint under the stencil. You are dabbing, not brushing on the paint.
Carefully lift off the stencil and your cold weather sign is complete.
You will notice on this pdf printable little dots inside the letters. Those are in case you want to forgo the burlap and instead would like to add lights to your canvas. You will stencil the letters on in the same way as the burlap canvas instructions. Then, poke holes where indicated through the canvas. Attach small Christmas lights behind the canvas and push one light through each hole. I love this idea. However, I was going for a rustic look so I went with the burlap version.
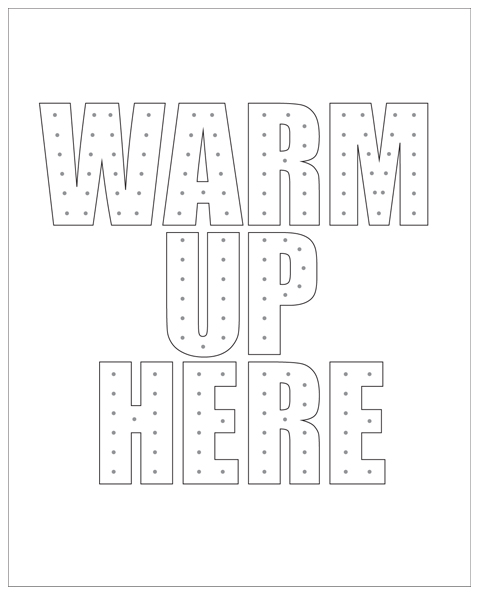
Have fun with this Warm Up Here Printable! However, do not sell or share the file as your own. Also, do not post the pdf on your social media page, please link back to this original post.
All 12 Days of December:
December 1st: Hot Drinks Bar Party Kit • Printable
December 2nd: Warm Up Here Burlap & Canvas • DIY {you’re already here}
December 3rd: Photo Booth Backdrop • DIY
December 4th: Snowman Photo Booth Props • Printable
December 5th: Let it Snow Gift Card Holders • Printable
December 6th: Christmas Gift Box • Printable
December 7th: Christmas Tree Canvas Painting • Tutorial
December 8th: Hot Drink Pouch • Printable
December 9th: Build Your Own Snowman Gift Tags • Printable
December 10th: Let it Snow Gift Tags • Printable
December 11th: Christmas Word Search • Printable
December 12th: Let it Snow • Printable
I would love to see how you used these 12 Days projects. Please share your creation(s) with us here.
The post 12 Days: Warm Up Here Burlap and Canvas appeared first on .
]]>Read more "No Sew Star Bunting"
The post No Sew Star Bunting appeared first on .
]]>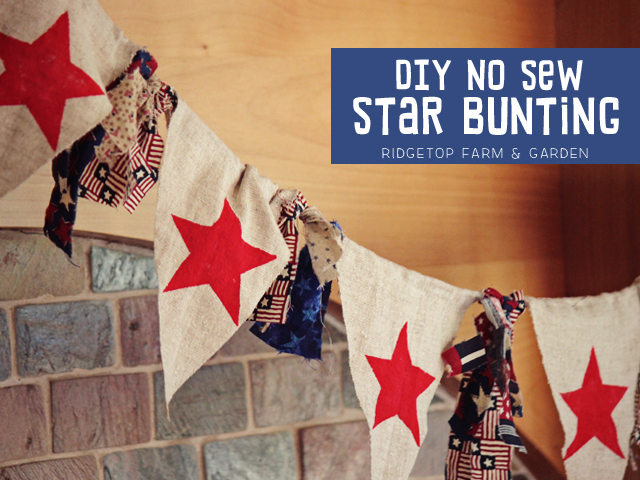
To go along with the Freedom Canvas I recently made and our patriotic themed mantel, I created a no sew bunting. It was so simple to make. A little fabric, hot glue, red paint, and twine turned into new decor for summer.
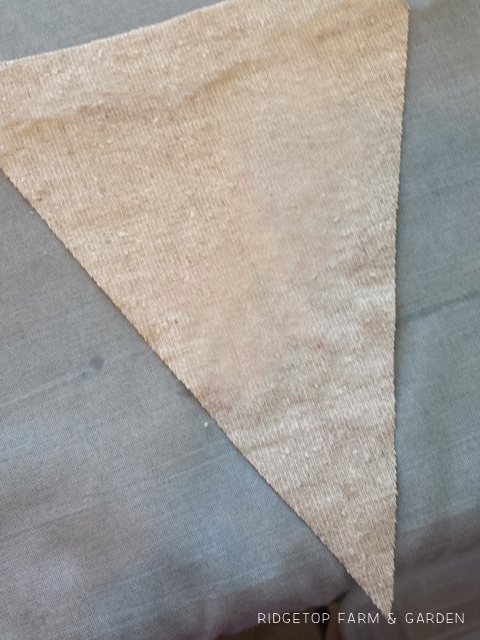
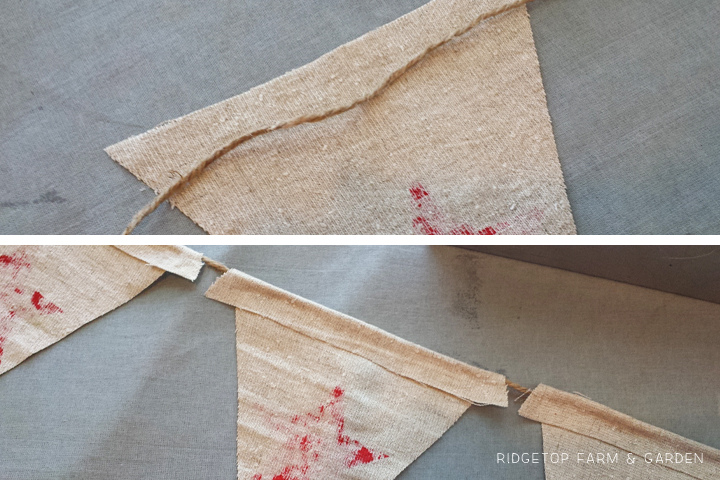
THE CANVAS TRIANGLES
I used leftover canvas fabric from our Jedi robes to cut the triangles. They are about 5.5″ wide & 7″ high. I cut 12 triangles and left them unfinished.
THE STARS
My printer wasn’t working, so I had to freehand a star for the stencil. Eek!
I drew the star on cardstock and cut it out. The cardstock stencil won’t hold up forever, but it worked perfectly for the 12 stars I needed.
Next, I used red acrylic paint and dabbed it through the stencil on each canvas triangle.

ATTACHING THE TRIANGLES TO THE TWINE
I cut a long length of twine to fit our mantel and eye-balled where to place the triangles. The canvas is folded over the twine and hot glued in place. Once I finished all 12 triangles I cut off the two small excess pieces that was now showing in the front.
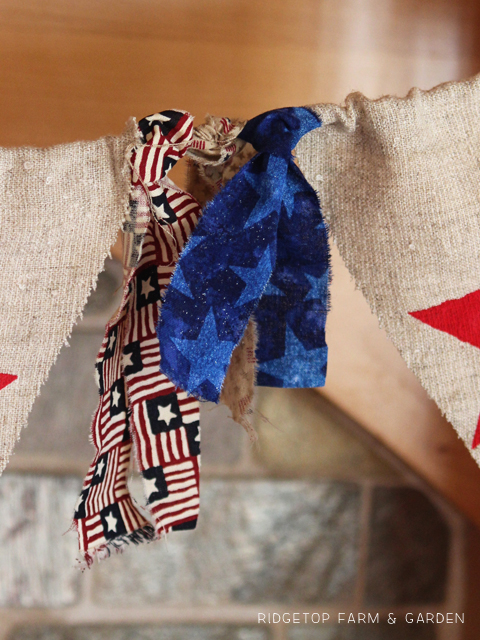
FABRIC STRIPS
For a chic look, I added a variety of fabric strips in between each triangle. I used leftover fabric scraps to make the strips. I simply tore the fabric in various lengths, then knotted them around the twine.
BUNTING ON DISPLAY
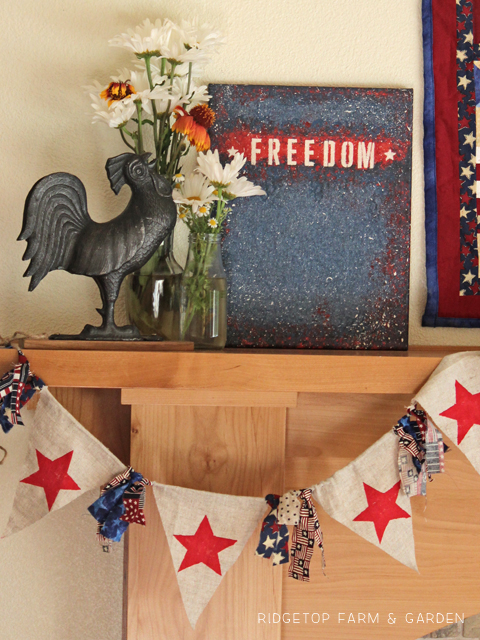
Happy 4th of July from Ridgetop Farm & Garden!
The post No Sew Star Bunting appeared first on .
]]>Read more "DIY Freedom Canvas"
The post DIY Freedom Canvas appeared first on .
]]>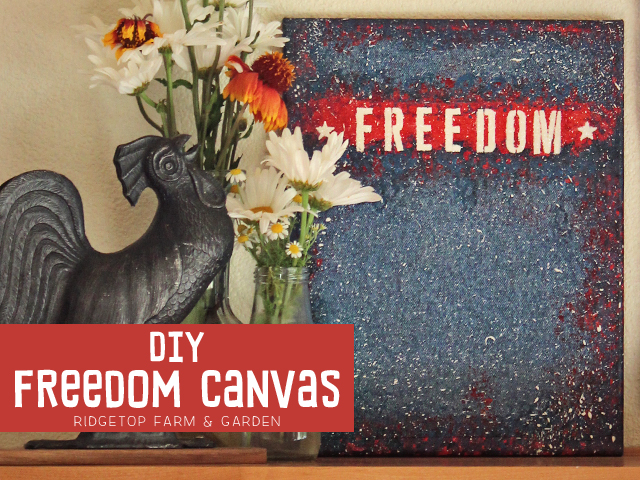
Our fireplace mantel was in need of a summer redesign. I chose to go with a patriotic theme, but needed a couple more items to complete the look. The area was calling for a picture or graphic, so I created this collage style canvas. It has a rustic feel, is filled with imperfections, and works perfectly in this spot.
This post contains affiliate links.
SUPPLIES
• Acrylic Paint
(I used Engine Red, Poppy Red, Dutch Blue, Charcoal & White)
• Paint brush, spouncer & sponge
• 11 x 14 canvas
• Denim patterned scrapbook paper
• Mod Podge
• Letter Stencils
(I used these ones from Martha Stewart Crafts)
• Clear Glitter
• Glitter Glue
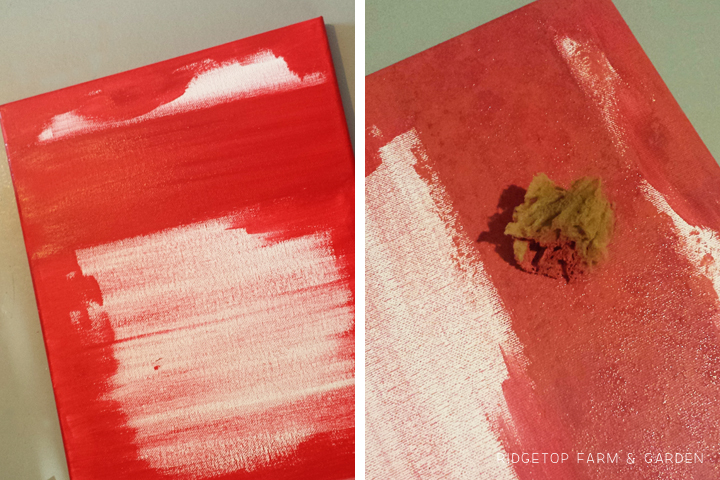
PAINT RED BACKGROUND
Using Engine Red paint, I brushed paint around the edges, sides and in the area the text would be going. I skipped the middle area because the scrapbook paper will be covering that spot.
Next, I sponged Poppy Red paint on the canvas.
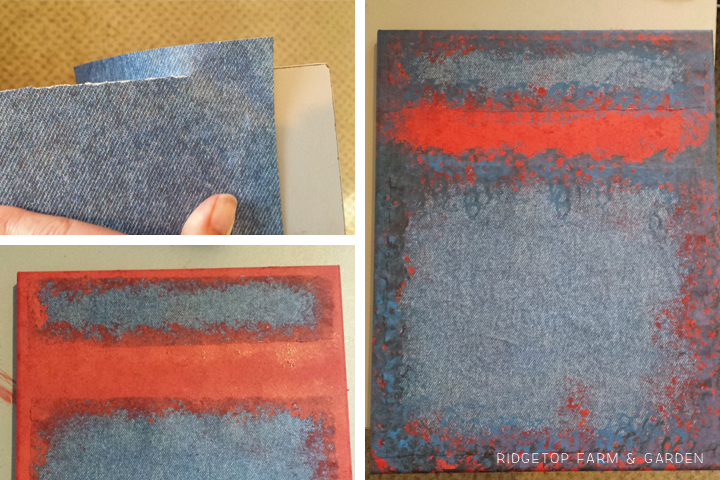
BLUE DENIM MOD PODGE
I trimmed the straight edges off the scrapbook paper by tearing it against the edge of my table. This gives a less than perfect feel to the project, which I like.
Then I tore the scrapbook paper all the way across at 2.5″ leaving me with two pieces of paper.
I used mod podge to glue the two pieces of denim paper to the canvas.
Next, I sponged on Poppy Red paint to soften the edges around the mod podged paper. Then I did the same sponging technique with Dutch Blue and a tiny bit of Charcoal paint.
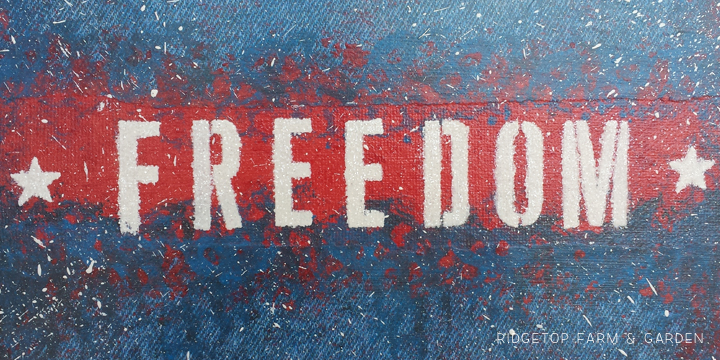
TEXT & SPLATTER
For the text, I used Martha Stewart stencils and white paint. I used a spouncer to apply the paint.
Then I used a paint brush and the splatter technique to add white “stars” to the canvas.
After the paint dried I applied a coat of Mod Podge over the entire canvas.
When the canvas was dry, I brushed glitter glue over the letters and sprinkled on glitter.
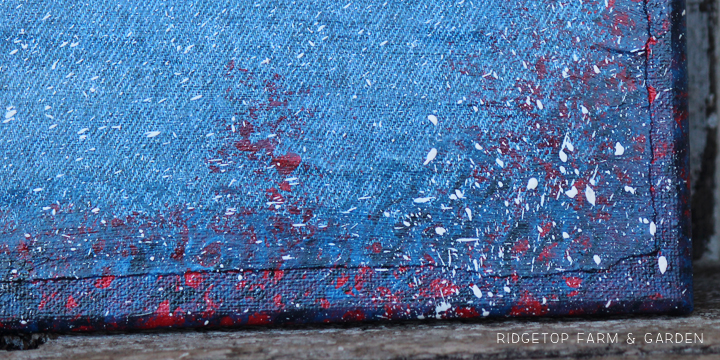
FINISHED CANVAS
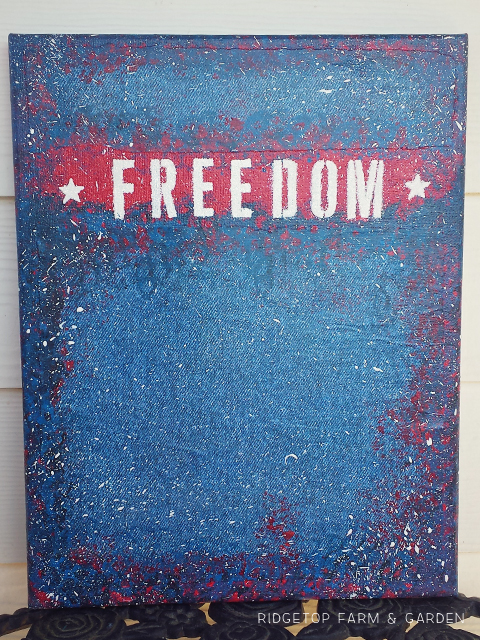
Thank you to our Service men & women who protect our freedom!
The post DIY Freedom Canvas appeared first on .
]]>Read more "Christmas Sewing Projects"
The post Christmas Sewing Projects appeared first on .
]]>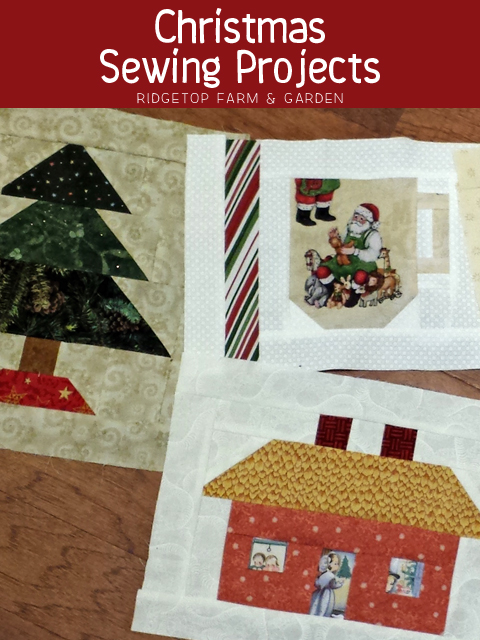
The few weeks leading up to Christmas were cold and/or rainy making it perfect weather to work on inside crafty projects. I got out the sewing machine and made a few Christmas presents.
My sewing skills would be considered novice & I typically tend to get in over my head. I have a horrible time understanding the printed directions in a pattern and spend way too much time with my seam ripper. Thankfully, my skills must be improving. I didn’t have TOO much trouble with these projects.
UNIFORM BAGS

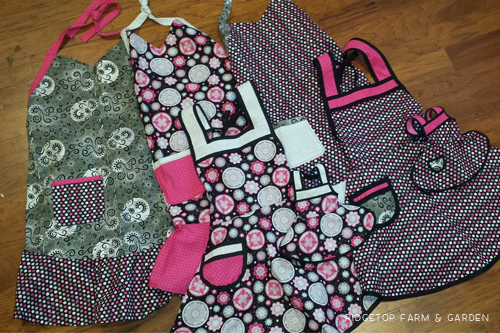
APRONS
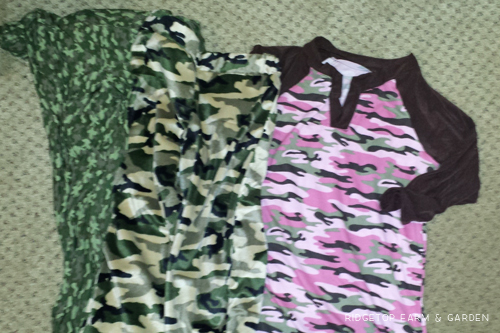
CHRISTMAS EVE PAJAMAS
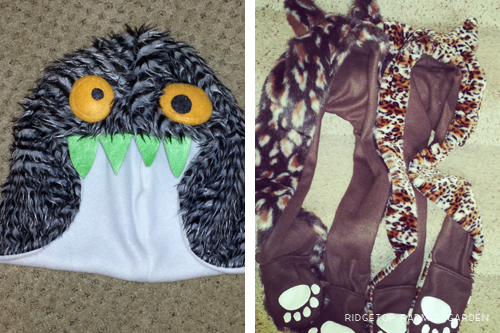
These didn’t turn out as well as I had hoped. The pajama pants I made for the boys are way too big in the butt area. Maybe I sewed them wrong? My kids just don’t have that much junk in the trunk. The nightgown, though, turned out ok.
FUN HATS
PILLOWCASE
 Bacon” fabric at Joann’s and knew I had to make something with it for my oldest son. He really does love bacon & he’s currently raising pigs. I decided on a pillowcase. It’s not my best work. But, he doesn’t seem to mind.
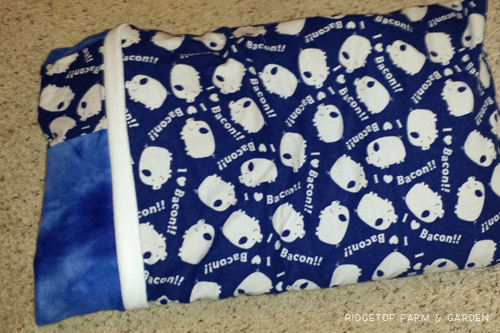
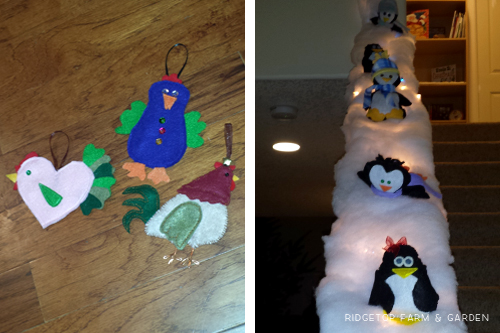
FELT FUN
The kids & I made felt chicken ornaments for our Poultry 4H gift exchange. I made the rooster at the lower right. It took me a couple hours to sew him together. He’s cute, but I don’t think he’s cute enough for the time I spent on it.
I didn’t use a pattern for the penguins. I found a couple photos and then winged it. It’s not quite as cute of a display as I was hoping, but the penguins turned out ok. And, most importantly, the kids loved it.
CHRISTMAS QUILT
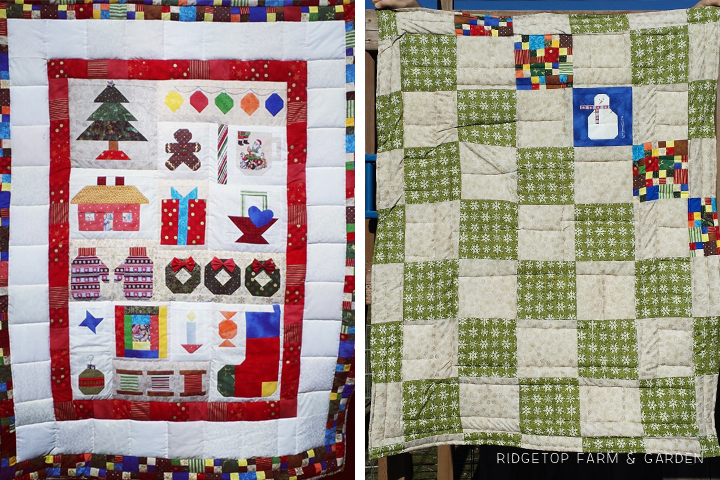
It’s been a long time since I have had much time to dedicate to sewing. It was nice.
I hope everyone is having a happy holiday season!
The post Christmas Sewing Projects appeared first on .
]]>The post Halloween Fun appeared first on .
]]>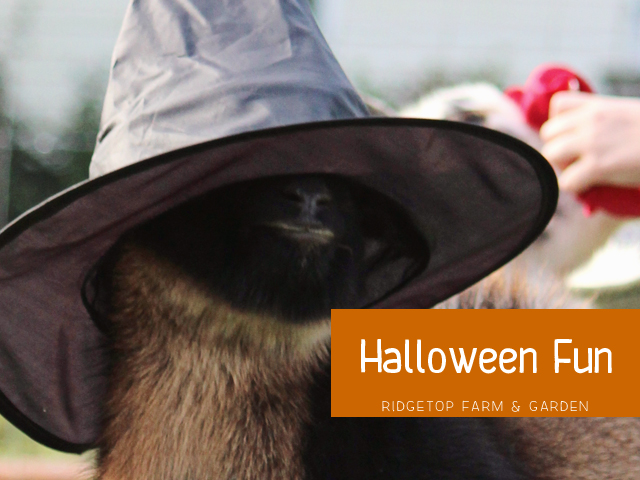
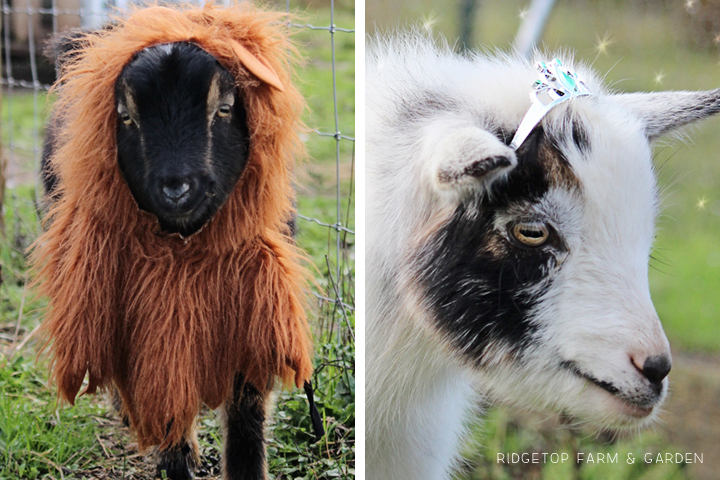
I have fun taking photos of our critters. Typically, I like them in their natural setting, but sometimes I add props or backgrounds. This time I chose items from my kids dress up bin to dress up the goats for Halloween. I’m not sure they loved this photo shoot.
The post Halloween Fun appeared first on .
]]>Read more "31 Days in Oregon: Roloff Farms"
The post 31 Days in Oregon: Roloff Farms appeared first on .
]]>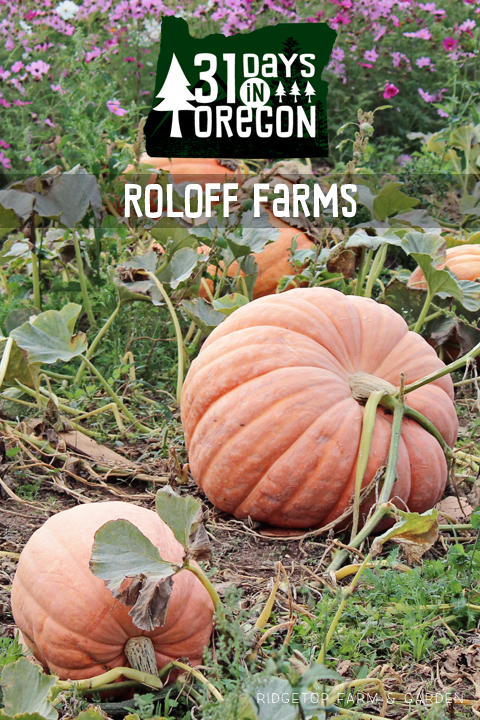
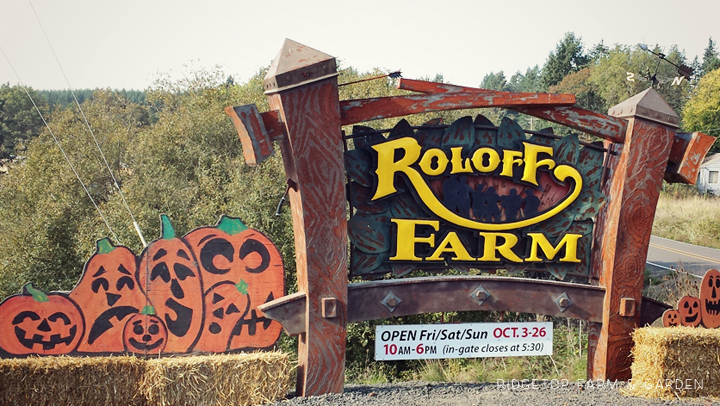
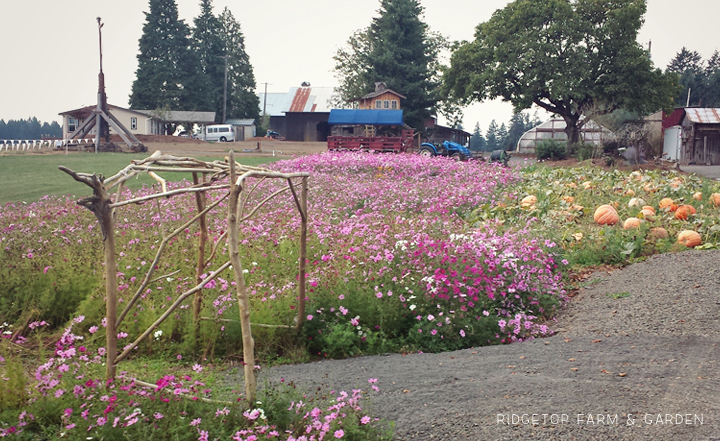
Since the last day of this 31 Day Challenge falls on Halloween, I’m highlighting a pumpkin patch. I’m choosing Roloff Farms, which is in the Helvetia community of Hillsboro, Oregon. The Roloff’s are stars of TLC’s Little People Big World. The pumpkin patch came before the tv show, but certainly had less hype.
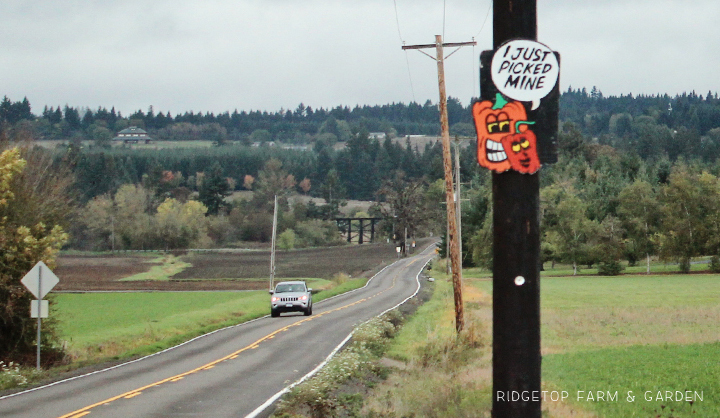
Along the drive to the Roloff’s are pumpkins letting you know you’re headed in the right direction.
The pumpkin patch is open Fridays, Saturdays & Sundays in October.
The Entrance
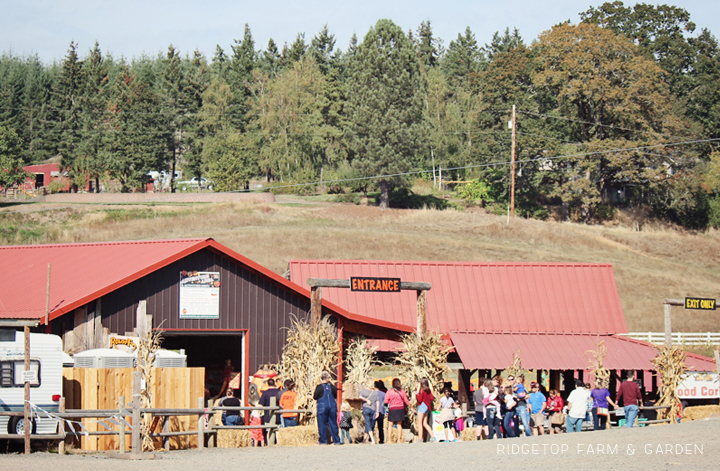
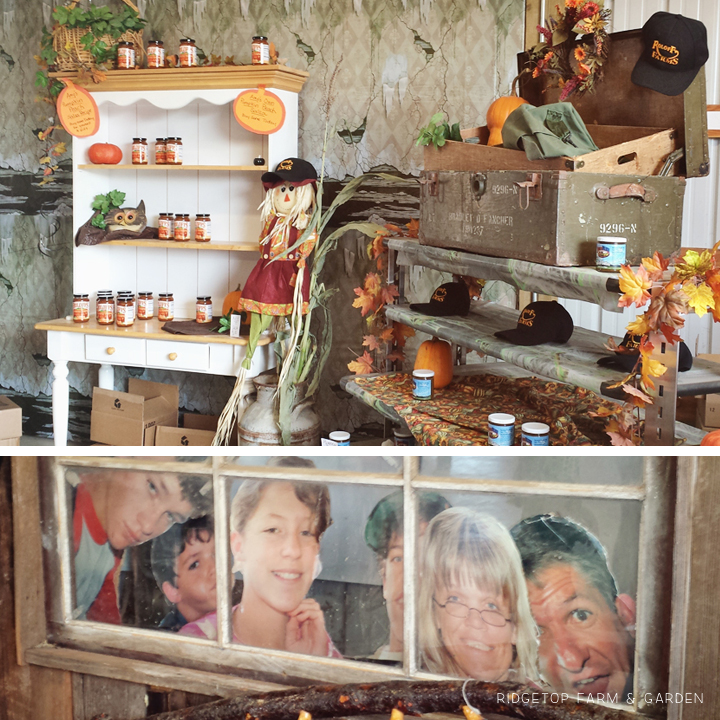
While waiting to buy your tickets, you can also pick up Amy’s Pumpkin Peach Salsa, Roloff books & souvenirs.
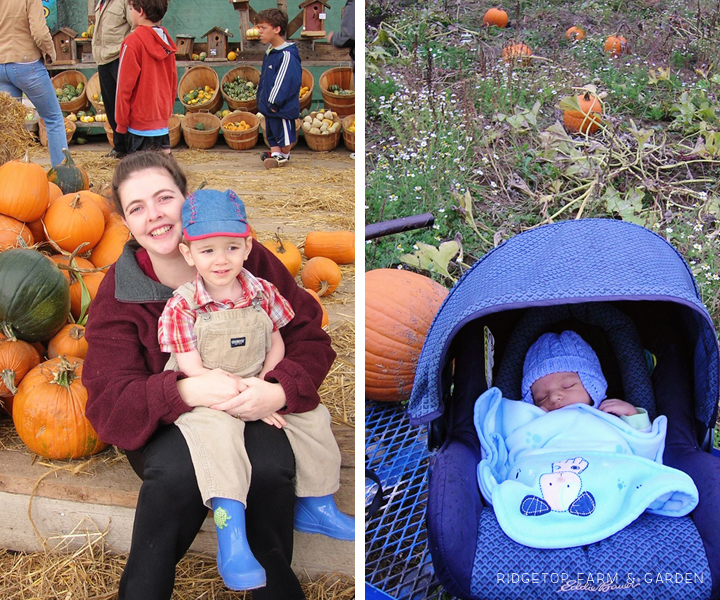
Halloween’s Past
Even before the craziness a tv show can bring, the Roloff’s had a nice pumpkin patch to visit.
Left: Here are Farm Kid & I in 2005.
Right: Farm Kid2 at Roloff Farms in 2005
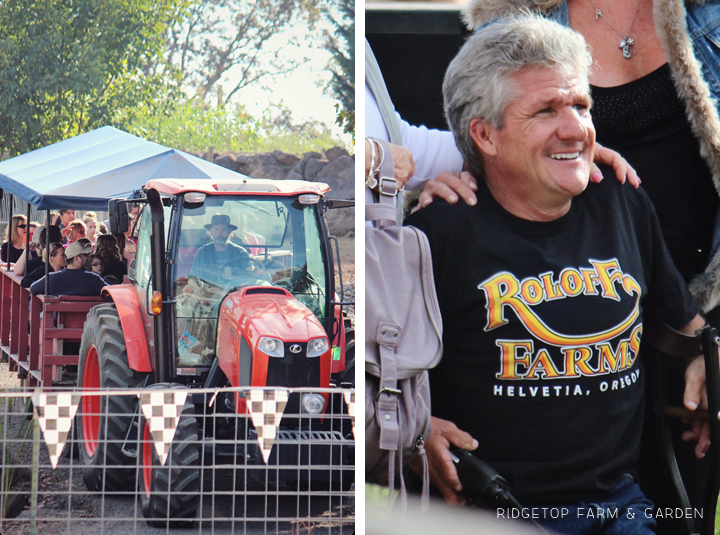
Wagon Tour
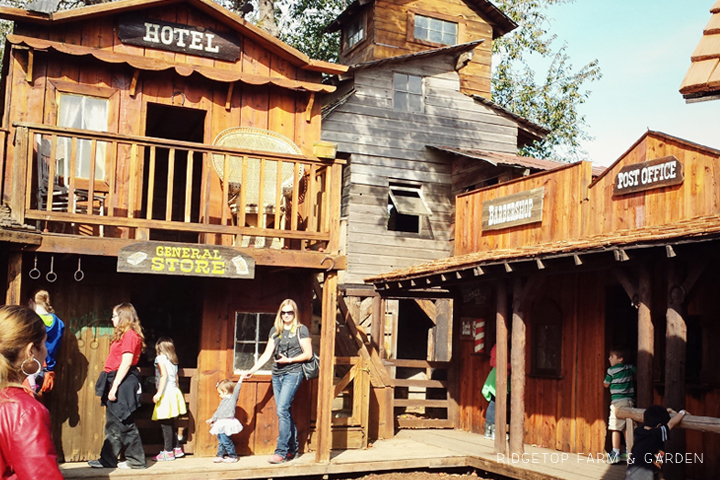
Now days, the way to see their farm is to purchase tickets for the wagon tour. The tour takes you throughout their farm showing you the most popular places, with a short stop in their western town.
While waiting in line to board the wagon tour, we spotted Matt Roloff posing with visitors.
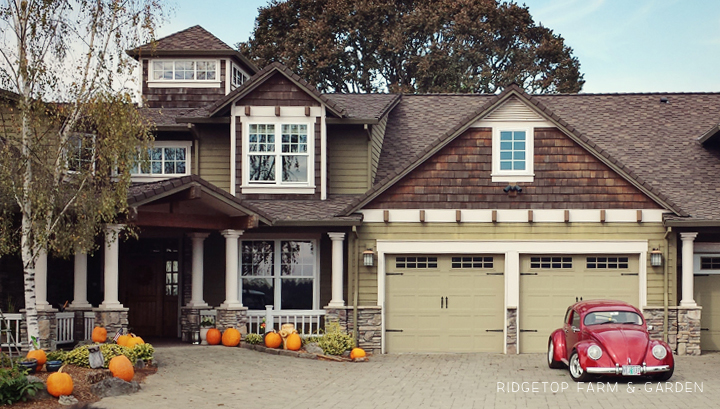
The Roloff home
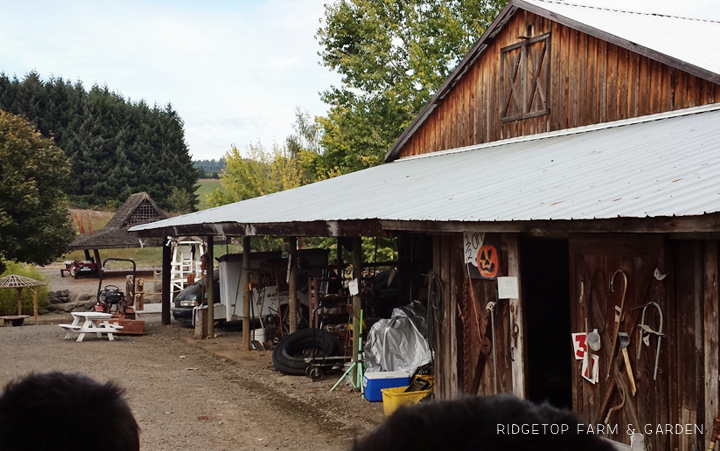
Matt’s Men’s Crisis Center. In other words, his shop.
Noah’s Ark
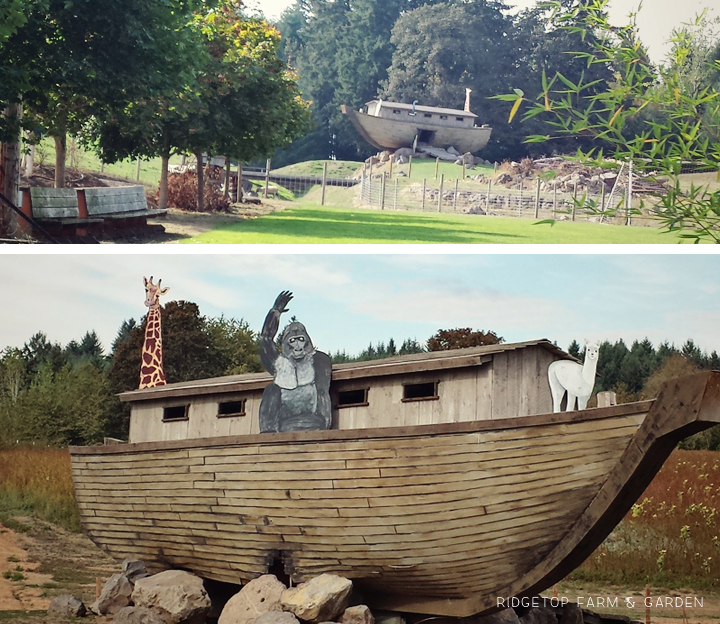
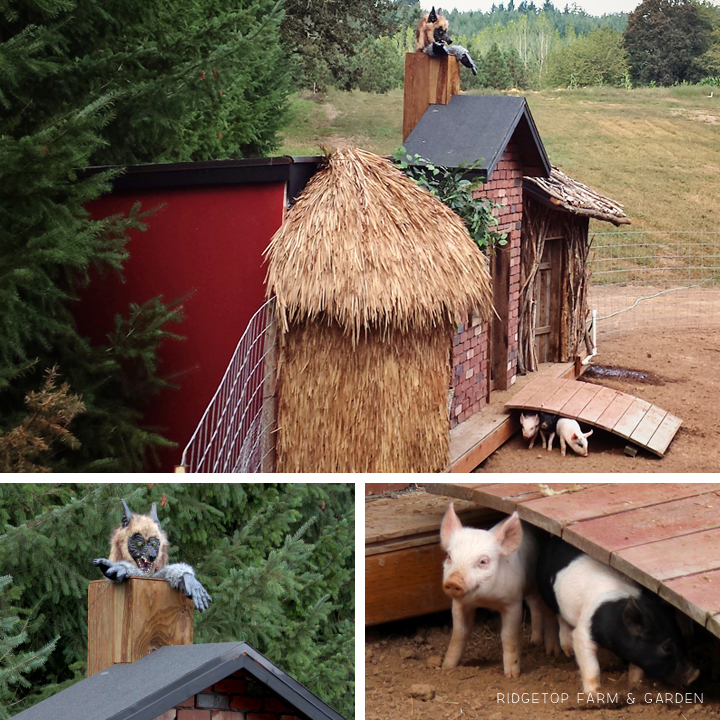
Too, too cute! Straw, stick & brick homes from Three Little Pigs. Complete with 3 little pigs. The kids & I oohed and aahed over this, maybe because we recently added a couple pigs to our farm.
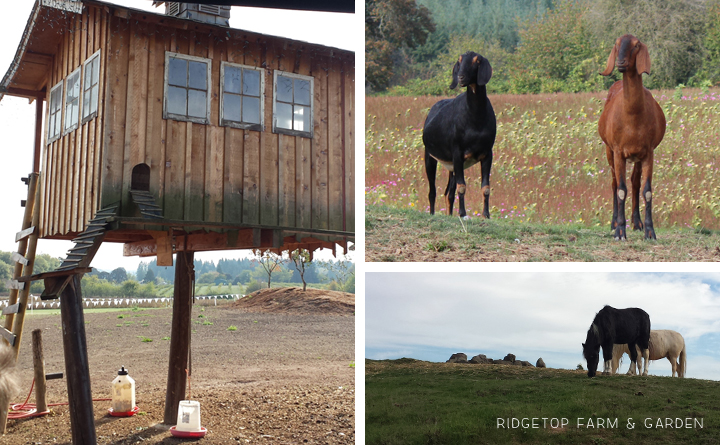
Left: Raised chicken coop to protect their flock from predators. Clever.
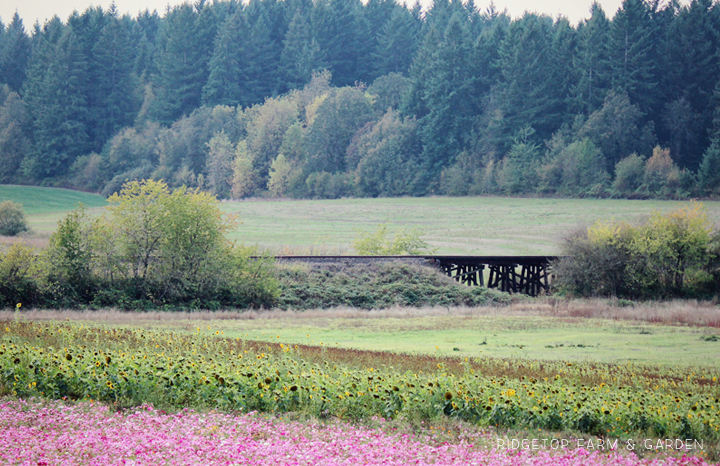
The trestle
Wedding Barn
It is rustic & lovely
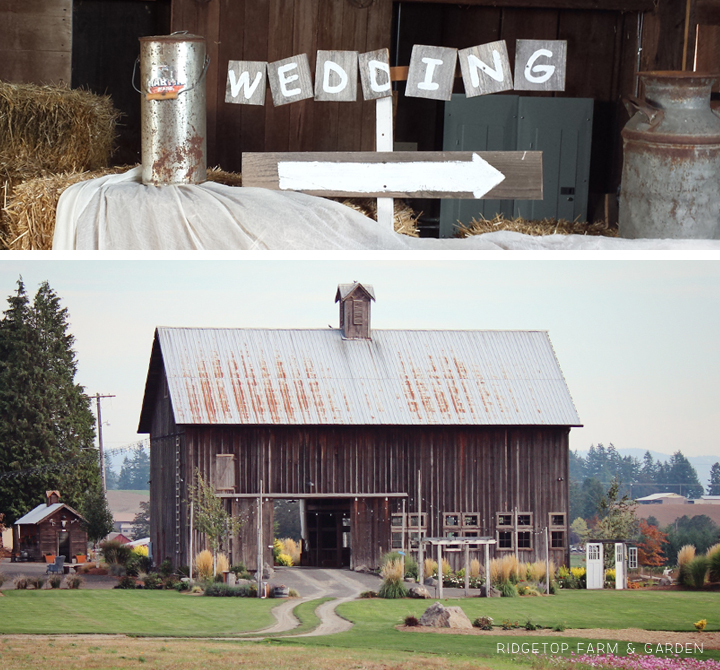
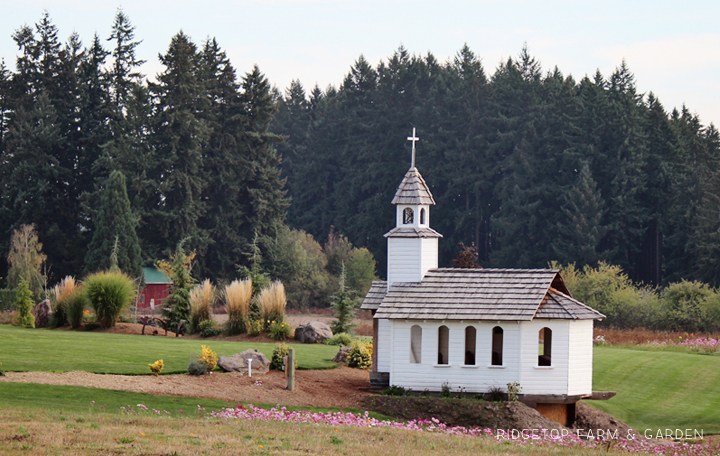
Super cute little church built by Matt Roloff.
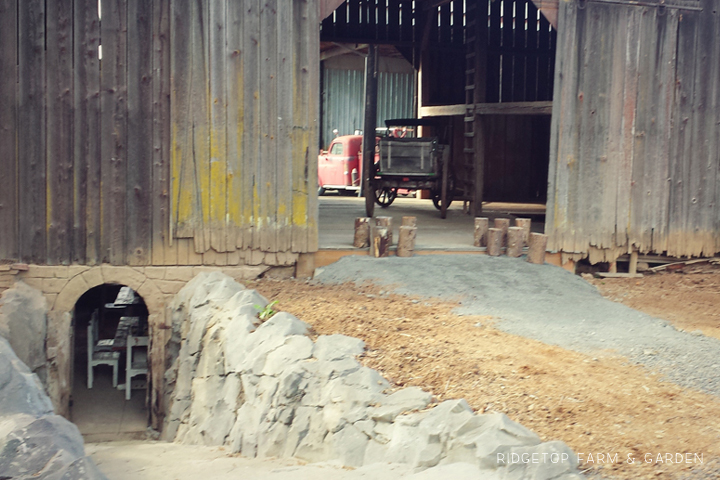
Beneath a barn is a wine cellar
Old West Town in 2005
Years ago, we didn’t pay to take a tour of the farm. It was just part of the fun coming to this pumpkin patch. We got to explore the old town as long as we wanted. However, back then it wasn’t crazy crowded like it is today.
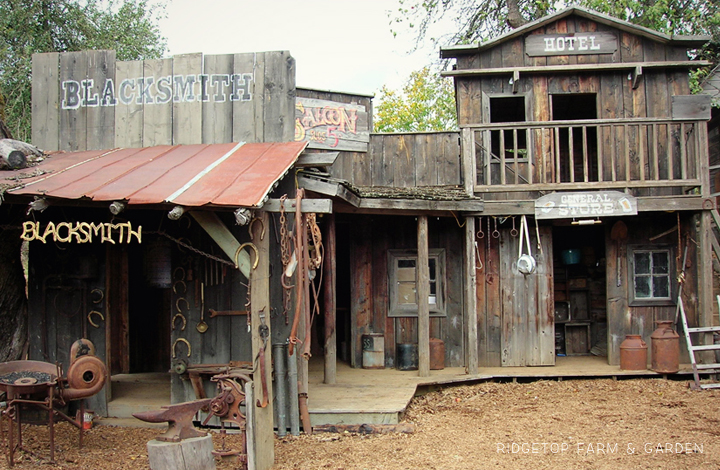
The Old West Town Today
The wagon tour stops here for a few minutes to let you explore the town. It really is impressive.
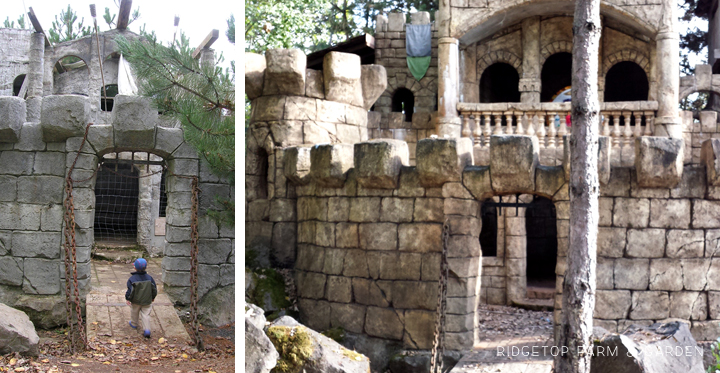
Left: Molly’s Castle 2005
Back in the day, we could also explore the castle.
Right: Molly’s Castle today
I believe our tour guide told us that it was just recently completed.
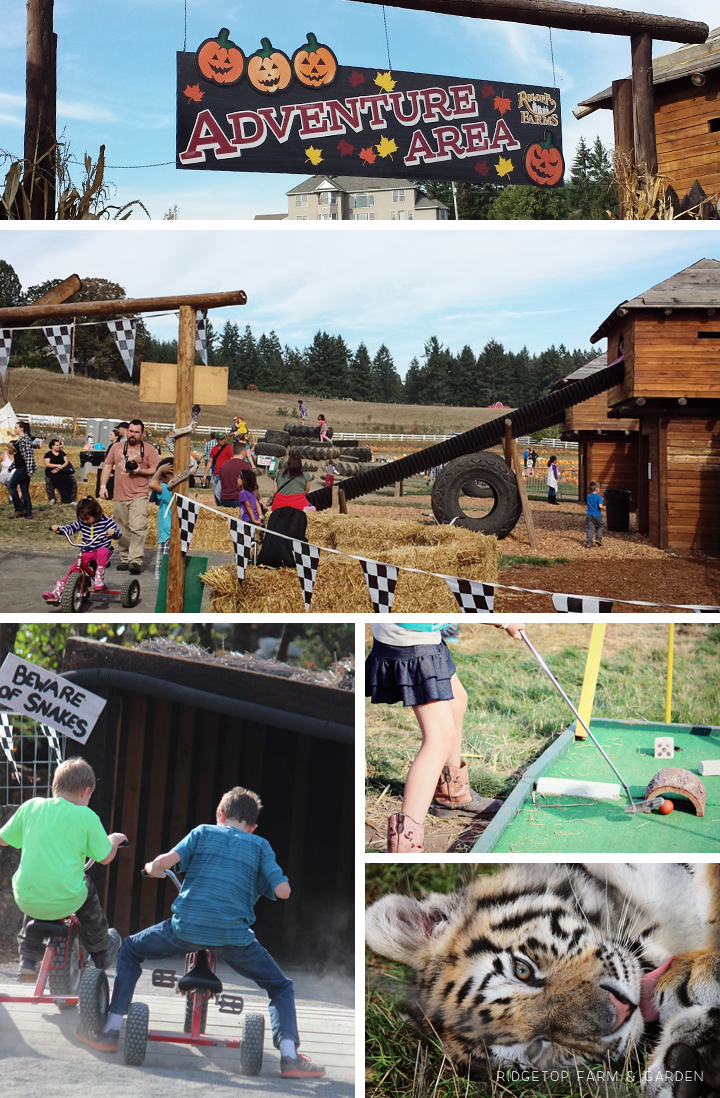
Adventure Area
The adventure area was pretty great with tons of fun things for the kids. There were slides, tricycle racing, mini golf and even big cats from A Walk on the Wild Side.
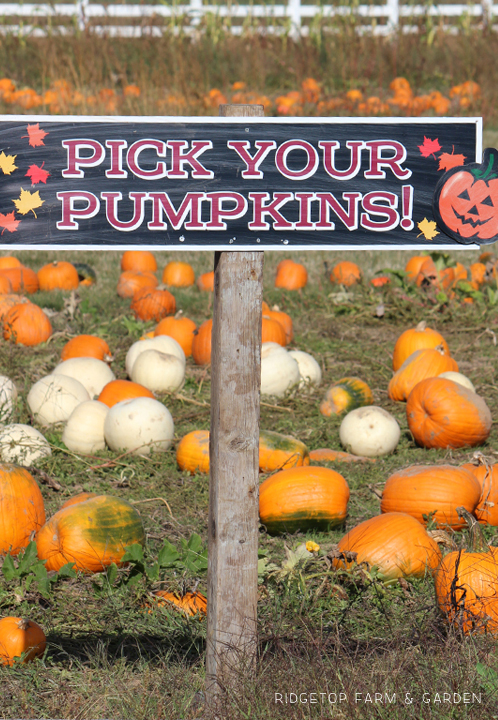
Pumpkins
Don’t forget to pick your pumpkins.
The first year we went to Roloff Farms was in 2005. We loved it. It was a quiet evening, slightly wet out and nearly no visitors at the pumpkin patch. As far as I was concerned, it was perfect. While we were paying for the pumpkins, John struck up conversation with Matt Roloff and realized he was working for a company that Matt previously worked for. There was a camera man or two around, but we didn’t think much of it. Later they asked us to sign papers saying it would be ok if we ended up in a new documentary featuring little people. As far as I know we didn’t end up in any episodes. But, we didn’t have cable tv back then, so I didn’t watch the first few seasons.
The next year, I went back with my mom on a Saturday morning. It was so crowded and crazy. It took forever just to get parked. I didn’t go back again after that.
Eight years later, I decided to go back & check it out. I loved it. I went expecting a crowd, so I was prepared this time. Also, they are better prepared for the crowds & parking wasn’t a problem. It was $12 per person to enjoy both the wagon tour & adventure area. Not super cheap, but also not outrageous. It is the most I have spent for pumpkin patch activities, but there was a lot to see & do.
They did have a couple food options available. But, you could also drive the one minute it takes to get to the Helvetia Tavern for a burger if you’re hungry.
Happy Halloween!
To see what others are sharing for the month of October check out write31days.com
The post 31 Days in Oregon: Roloff Farms appeared first on .
]]>The post Cinco de Mayo appeared first on .
]]>
On the 5th of May the kids did not work on their regular curriculum. Instead, we had a Mexican themed party day.
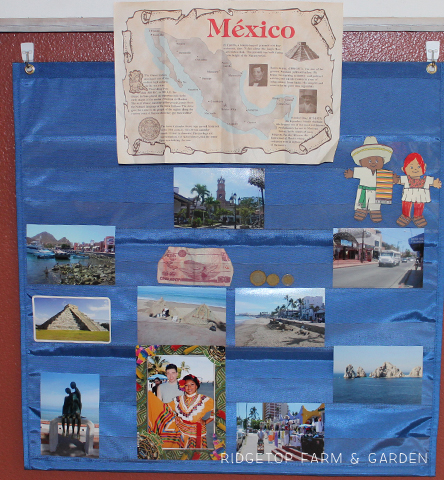
I took the items in the pocket chart out and replaced them with Mexico related things. My mom gave me the map with info on it, which was a placemat from a restaurant. The photos, money, and dress up dolls came out of our North American Continent Box.
I read Tomie dePaola’s Adelita to the kids. It is a Mexican Cinderella story.
As a comparison, I also read Cinders by Jan Brett. This book is a Chicken Cinderella story, which of course, we loved. We also discussed Disney’s version of Cinderella.
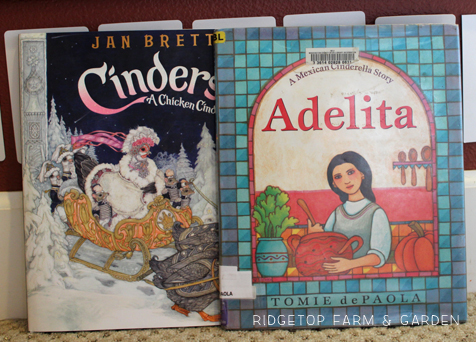
This was a win, win, win conversation. I love Jan Brett, I love Tomie dePaola, and I love Disney.
For lunch we had one of my favorite meals: chicken tacos, with Spanish rice and beans. I even pulled out the hand painted dishes we bought in Mexico many moons ago.
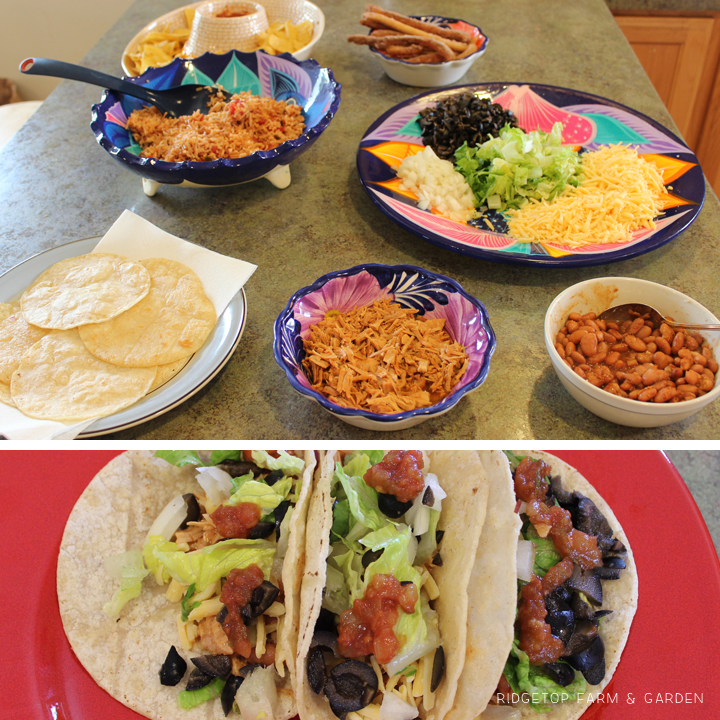
We ate homemade churros after lunch.
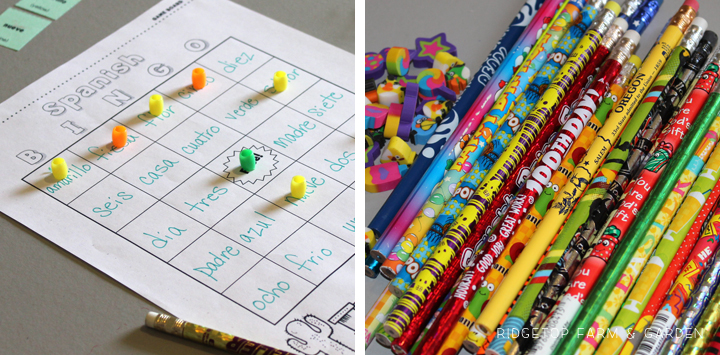
Spanish bingo has been a huge hit on our Mexico days, so we played it again. Bingo prizes were leftover pencils & erasers.

The kids also made a few crafts that day.
It’s a lot of work to put together a theme day, but they are so much fun.
The post Cinco de Mayo appeared first on .
]]>